Label Printing Artwork Guide

Welcome to Mediapoint’s Label Printing Artwork Guidelines. Here, we outline all the necessary steps and requirements to ensure your label / sticker artwork is print-ready – meeting our quality standards. Please follow these guidelines closely to avoid any delays or issues with your printing project.
To download the label printing guide as a PDF for your team – CLICK HERE
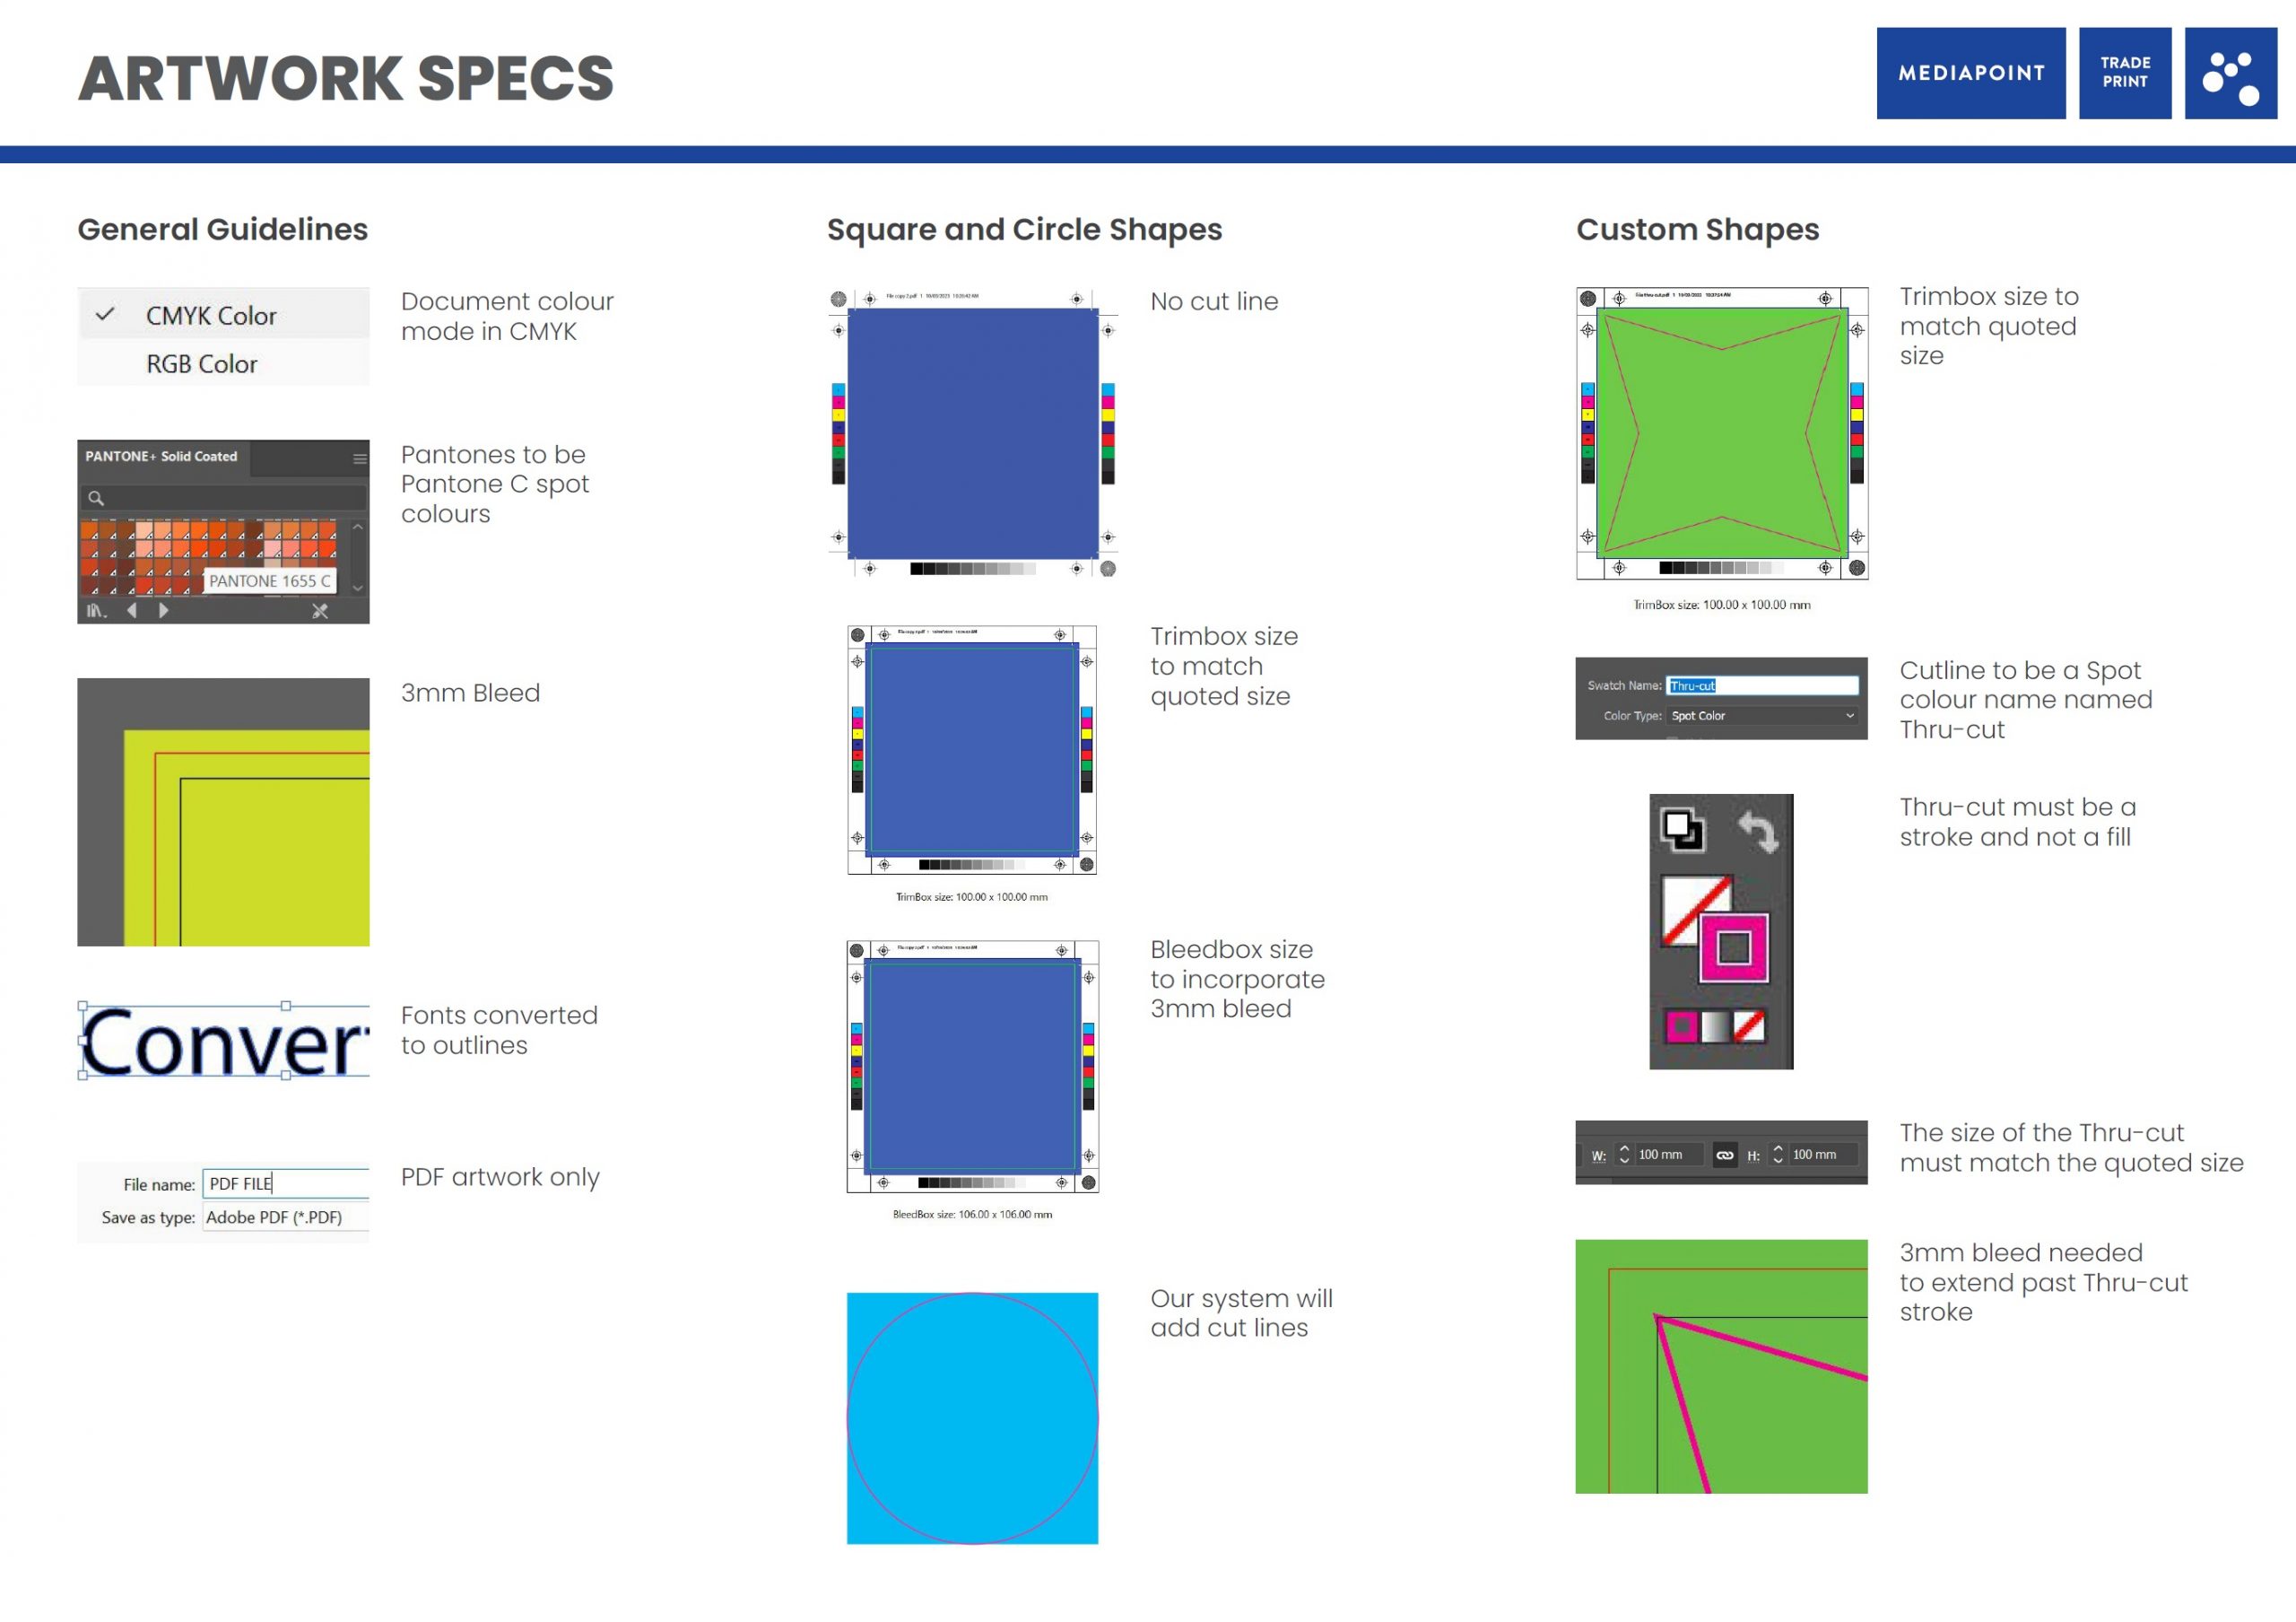
General Printing Guidelines: Document Setup
Colour Mode
- All artwork must be submitted in CMYK colour mode to ensure colour accuracy in the final print.
Pantone Colors
- Specify Pantone C spot colours where applicable to maintain colour consistency.
Bleed
- Ensure a 3mm bleed around your artwork to allow for any slight misalignments during the cutting process.
Fonts
- Convert all fonts to outlines to prevent any font substitution issues. This is a critical part of the file setup process so please take care to double-check fonts.
File Format
- Submit your artwork files in PDF format only for optimal compatibility and print quality.
Square and Circle Label Print Guidelines
Cut Lines
- No Cut Line Required For Square & Circle Label Printing: Our system will automatically add cut lines based on the bleedbox and trimbox specifications.
Size Match Trimbox
- The trimbox size should match the quoted size. It is important to double-check your trimbox on any label artwork and correlate to the size specified in the quote.
Bleedbox Size
- The bleedbox size must incorporate the 3mm bleed.
Custom Shape Label Printing Guidelines
Cut Lines
- The cut line for custom label shapes must be a spot color named “Thru-cut”. Furthermore, this must be a stroke; not a fill.
- The size of the Thru-cut must match the quoted size.
Bleedbox
- Ensure that a 3mm bleed extends past the “Thru-cut” stroke mentioned above.
Size Match Trimbox
- The trimbox size must match the quoted size regardless of shape. Match your trimbox size accurately to ensure no hiccups or delays.
Want to nail Thru-Cut and Spot Colour requirements? Check out our video guides.
White Ink Printing Guidelines
Spot Colour
- Use a spot colour named “White” for any white ink printing applications. This is necessary for printing order and important for your pre-press preview checks.
Printing Order
- White ink is always printed first, followed by CMYK colors. Overprint settings must be used according to your artwork setup.
Overprint & Adobe Print Production Tips
- Utilising Adobe Acrobat’s Print Production feature will output a helpful preview to ensure separations and artwork is correctly set up.
- When previewing in Adobe make sure to select “Simulate overprinting”. This will help and verify overprint settings for the White Ink spot color.
- Select each separation to ensure spot color is correct and overprint settings are as intended.
Submission Checklist
Before submitting your artwork, please ensure you have adhered to all the above general guidelines. We recommend following this simple checklist of major items ahead of submitting label artwork to eliminate errors:
- Ensure CMYK Colour Mode
- Specify Pantone C Colours
- Confirm 3mm Bleed
- Convert all fonts to outlines
- Ensure File is .PDF Format
- Use Adobe Acrobats ‘Print Production’ output preview
- Review and Confirm Specific Shape & Ink Guidelines
Remember incorrectly prepared files may lead to delays or additional costs. If you have any questions or require assistance, please contact our team.


